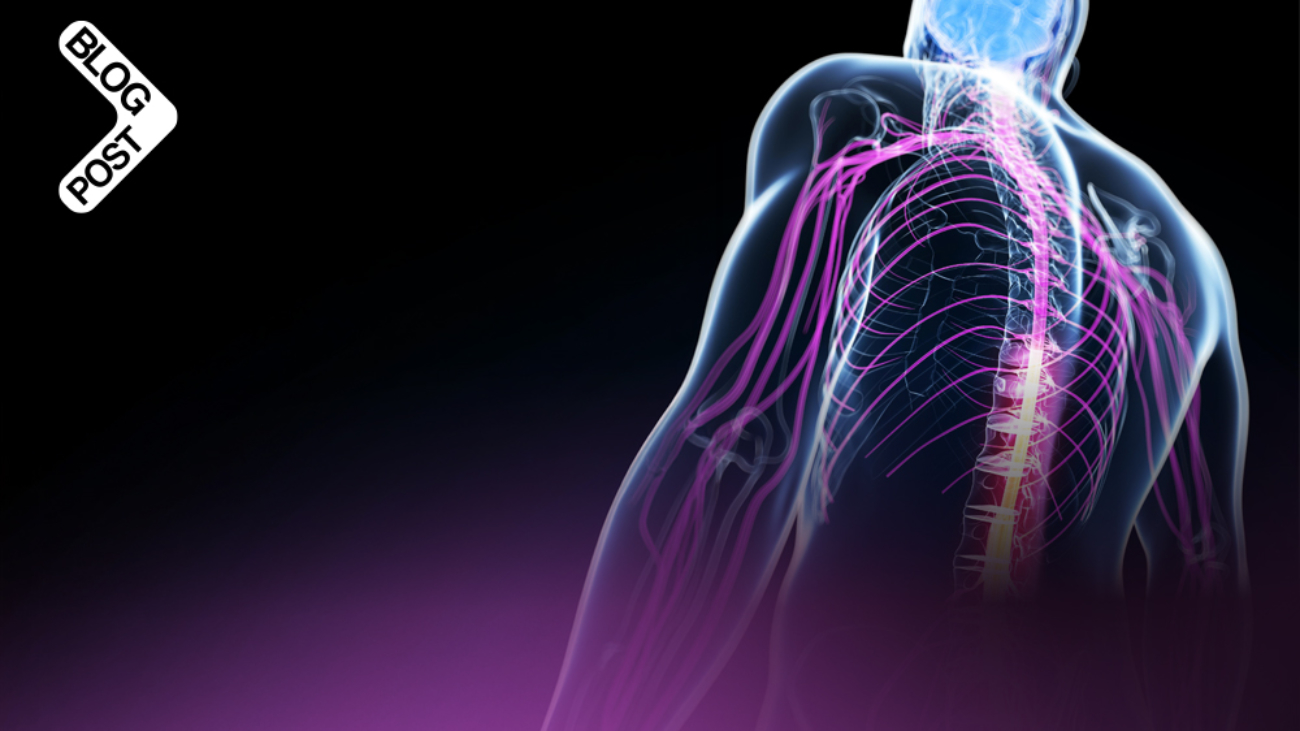
Neuromuscular diseases encompass a heterogeneous group of inherited and acquired disorders characterized by progressive impairment of skeletal muscle function. Conditions such as amyotrophic lateral sclerosis (ALS), Duchenne muscular dystrophy (DMD), spinal muscular atrophy (SMA), and various myopathies and neuropathies commonly lead to respiratory muscle weakness, which represents a major cause of morbidity and mortality in these patients (1–3). Advances in respiratory support have transformed the natural history of many neuromuscular diseases, with home mechanical ventilation (HMV) now playing a central role in long-term management (4,5).
Respiratory failure in neuromuscular diseases differs fundamentally from that observed in primary pulmonary disorders. Inspiratory muscle weakness results in reduced tidal volume and alveolar hypoventilation, while expiratory muscle dysfunction compromises effective cough and secretion clearance (6,7). In addition, bulbar muscle involvement may impair airway protection and exacerbate ventilatory insufficiency (8). These pathophysiological mechanisms often evolve gradually, with sleep-related hypoventilation frequently preceding daytime hypercapnic respiratory failure, highlighting the importance of early detection and timely intervention (9,10).
Home mechanical ventilation has emerged as a preferred strategy for managing chronic respiratory failure in patients with neuromuscular disease, enabling long-term ventilatory support while preserving autonomy, social participation, and quality of life (4,11). Both non-invasive ventilation (NIV), delivered via masks or mouthpieces, and invasive ventilation delivered through tracheostomy are employed in the home setting. The choice of ventilatory approach depends on disease progression, respiratory muscle function, bulbar involvement, patient tolerance, and individual preferences, as well as healthcare system organization and resource availability (12–14). In general, NIV is initiated during earlier stages of ventilatory insufficiency, whereas invasive ventilation is considered in advanced disease or when non-invasive strategies fail to ensure adequate ventilation or airway protection (15).
Technological developments have substantially improved the feasibility, safety, and effectiveness of home mechanical ventilation. Contemporary home ventilators offer advanced ventilation modes, sensitive triggering algorithms, leak compensation, integrated alarms, battery backup, and increasingly, remote monitoring capabilities (16–18). These innovations have facilitated the transition of ventilatory care from hospital to home environments. However, long-term home ventilation also introduces challenges related to device reliability, interface management, caregiver training, and regulatory oversight, which are particularly relevant in neuromuscular diseases where ventilation is often required continuously and over many years (19,20).
The clinical benefits of home mechanical ventilation in neuromuscular diseases extend beyond survival. Multiple studies have demonstrated improvements in gas exchange, sleep quality, symptom control, and health-related quality of life, as well as reductions in hospital admissions and healthcare utilization (4,11,21). Nevertheless, outcomes vary widely and are influenced by the timing of ventilation initiation, ventilator technology, interface selection, patient–ventilator interaction, and long-term adherence (22,23). Furthermore, decisions regarding escalation from non-invasive to invasive ventilation raise complex clinical, ethical, and psychosocial considerations that must be addressed through shared decision-making and multidisciplinary care (24).
Given the growing population of patients receiving long-term home mechanical ventilation for neuromuscular disease, a comprehensive understanding of clinical indications, ventilator technologies, interfaces, outcomes, and limitations is essential for clinicians, biomedical engineers, and regulatory stakeholders. This review aims to synthesize current evidence on home mechanical ventilation in neuromuscular diseases, with a dual focus on non-invasive and invasive strategies, emphasizing physiological principles, device-related considerations, and clinically relevant outcomes.
Pathophysiology of Respiratory Failure in Neuromuscular Diseases
Respiratory failure in neuromuscular diseases arises primarily from progressive dysfunction of the respiratory pump rather than intrinsic abnormalities of the lung parenchyma or airways. The dominant mechanisms include inspiratory and expiratory muscle weakness, impaired upper airway control, and sleep-related ventilatory disturbances, which together lead to chronic alveolar hypoventilation and ineffective airway clearance (6,7).
Inspiratory Muscle Weakness and Alveolar Hypoventilation
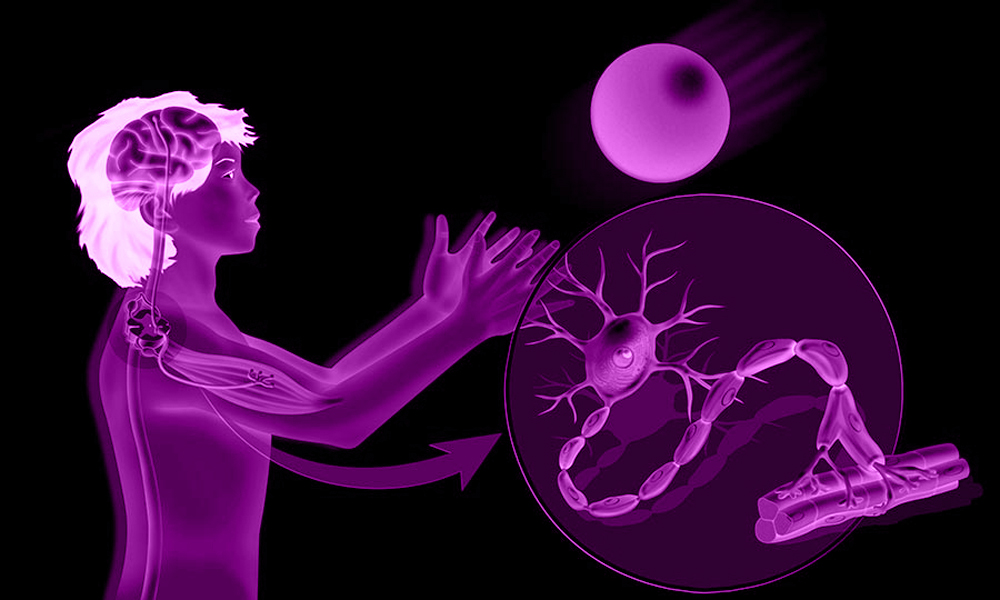
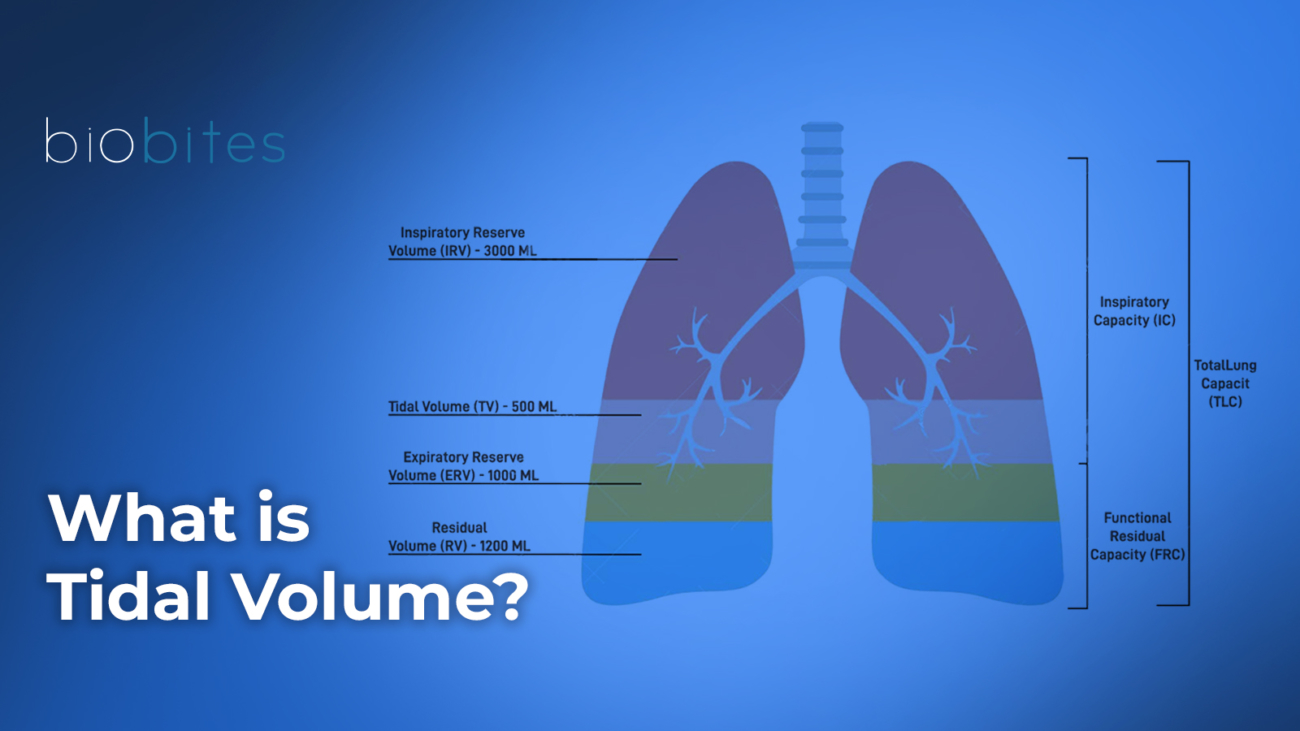
Weakness of the diaphragm and accessory inspiratory muscles is the principal determinant of ventilatory failure in neuromuscular diseases. As inspiratory muscle strength declines, the ability to generate adequate tidal volumes is progressively compromised, resulting in reduced minute ventilation and carbon dioxide retention (6). This impairment becomes particularly evident during sleep, when physiological reductions in respiratory drive and muscle tone further unmask diaphragmatic dysfunction (9,10).
Diaphragmatic weakness alters thoracoabdominal mechanics, often producing paradoxical inward movement of the abdomen during inspiration. Supine positioning exacerbates this effect by increasing abdominal pressure on the diaphragm, leading to orthopnea and nocturnal hypoventilation, which are frequently among the earliest clinical manifestations of respiratory involvement (6,9). Over time, sustained hypoventilation results in chronic hypercapnia and respiratory acidosis.
Expiratory Muscle Dysfunction and Ineffective Cough
Expiratory muscle weakness, involving the abdominal and internal intercostal muscles, plays a critical role in the pathogenesis of respiratory complications in neuromuscular disease. Reduced expiratory force leads to diminished peak cough flow and impaired clearance of airway secretions (7). As a consequence, patients are predisposed to secretion retention, atelectasis, and recurrent lower respiratory tract infections, which are major contributors to morbidity and hospitalization (7,8).
The inability to generate an effective cough also limits the patient’s capacity to respond to acute respiratory stressors, such as infections or aspiration events. These episodes frequently precipitate acute respiratory failure and may necessitate initiation or escalation of ventilatory support (7).
Bulbar Dysfunction and Upper Airway Impairment
Bulbar muscle involvement further aggravates respiratory failure by compromising upper airway patency, swallowing, and airway protection. In conditions such as amyotrophic lateral sclerosis, bulbar weakness contributes to aspiration risk, ineffective cough, and impaired coordination between breathing and swallowing (8,14). These abnormalities can significantly reduce tolerance of non-invasive ventilation by increasing mask leak, patient discomfort, and the risk of aspiration.
Bulbar dysfunction is therefore a key determinant in the selection of ventilatory modality. While non-invasive ventilation may be effective in patients with preserved bulbar function, progressive bulbar impairment often limits its feasibility and may prompt consideration of invasive ventilation via tracheostomy (14,15).
Sleep-Related Hypoventilation
Sleep-related hypoventilation is a hallmark feature of respiratory involvement in neuromuscular diseases and commonly precedes the development of daytime respiratory failure (9,10). During sleep, particularly during rapid eye movement sleep, reduced tonic activity of respiratory muscles leads to sustained hypoventilation rather than discrete apneic events. This results in nocturnal hypercapnia and oxygen desaturation, often accompanied by sleep fragmentation and poor sleep quality.
Clinically, sleep-related hypoventilation manifests as morning headaches, excessive daytime sleepiness, fatigue, and impaired cognitive performance. Detection of nocturnal hypoventilation is therefore a critical component of respiratory monitoring and frequently serves as an indication for initiating home mechanical ventilation (9,10).
Progression to Chronic Hypercapnic Respiratory Failure
As neuromuscular disease progresses, compensatory mechanisms become insufficient to maintain adequate ventilation, leading to chronic hypercapnic respiratory failure. Daytime hypercapnia reflects advanced respiratory pump failure and is associated with increased symptom burden, reduced functional status, and poorer prognosis (4,11). At this stage, ventilatory support is often required for extended periods and may progress from nocturnal use to daytime or continuous ventilation.
The rate of respiratory decline varies considerably among neuromuscular disorders and individual patients, underscoring the importance of regular respiratory assessment and timely initiation of home mechanical ventilation to prevent acute decompensation and improve long-term outcomes (12,13).
Clinical Indications for Home Mechanical Ventilation in Neuromuscular Diseases
Home mechanical ventilation is indicated in neuromuscular diseases when respiratory muscle weakness results in chronic hypoventilation, impaired gas exchange, or an increased risk of respiratory decompensation. The primary goals of ventilatory support are to correct alveolar hypoventilation, alleviate respiratory symptoms, prevent acute respiratory failure, and improve survival and quality of life (4,11).
Clinical Symptoms and Functional Indicators
Early respiratory involvement in neuromuscular disease is often insidious and may present with nonspecific symptoms. Common manifestations include exertional dyspnea, orthopnea, disrupted sleep, morning headaches, excessive daytime sleepiness, fatigue, and impaired concentration (9,10). Recurrent respiratory infections and ineffective cough may further indicate declining respiratory reserve (7).
Functional decline, including reduced exercise tolerance and difficulty speaking or swallowing in advanced disease, may also signal progression of respiratory muscle weakness. The presence of such symptoms, particularly when progressive or persistent, should prompt formal respiratory evaluation and consideration of home mechanical ventilation (9,12).
Physiological and Gas Exchange Criteria
Objective measurements play a central role in identifying candidates for home mechanical ventilation. Declining vital capacity, reduced maximal inspiratory pressure, and diminished peak cough flow are commonly used markers of respiratory muscle weakness (6,7). Nocturnal hypercapnia, detected by overnight capnography or arterial blood gas analysis, is a key physiological indication, even in the absence of daytime hypercapnia (9,10).
Daytime hypercapnia reflects advanced ventilatory pump failure and represents a clear indication for ventilatory support (4,11). In many neuromuscular diseases, intervention at the stage of nocturnal hypoventilation has been associated with better clinical outcomes compared with delayed initiation following the onset of daytime respiratory failure (10,11).
Disease-Specific Indications
The timing and thresholds for initiating home mechanical ventilation vary across neuromuscular disorders. In Duchenne muscular dystrophy and spinal muscular atrophy, predictable patterns of respiratory decline allow for proactive monitoring and early initiation of ventilation, often during adolescence or early adulthood (2,10). In amyotrophic lateral sclerosis, disease progression is more variable, and decisions regarding ventilation must balance physiological benefit, bulbar involvement, and patient preferences (5,14).
Despite these differences, the overarching principle across neuromuscular diseases is the early recognition of ventilatory insufficiency and timely initiation of support to prevent acute decompensation and preserve quality of life (4,11).
Choice Between Non-Invasive and Invasive Ventilation
Non-invasive ventilation is generally the first-line approach for home mechanical ventilation in neuromuscular disease due to its effectiveness, reversibility, and lower complication burden (4,5). It is most successful in patients with preserved bulbar function, adequate airway protection, and sufficient tolerance of interfaces (14).
Invasive ventilation via tracheostomy is considered when non-invasive ventilation fails to provide adequate ventilation, when airway protection is compromised, or when continuous ventilatory support is required (15,24). The decision to transition to invasive ventilation is complex and should involve shared decision-making, taking into account prognosis, quality of life, caregiver burden, and ethical considerations (24).
Monitoring and Timing of Initiation
Regular respiratory monitoring is essential in neuromuscular disease to identify the optimal timing for initiating home mechanical ventilation. Serial assessment of respiratory muscle strength, lung volumes, gas exchange, and sleep-related breathing abnormalities enables early intervention before the development of advanced respiratory failure (9,12).
Initiating ventilation before the onset of severe hypercapnia or recurrent hospitalizations is associated with improved tolerance and better long-term outcomes, emphasizing the importance of proactive rather than reactive management strategies (10,11).
Ventilator Types and Technologies in Home Mechanical Ventilation
The successful delivery of home mechanical ventilation (HMV) in neuromuscular diseases relies heavily on appropriate ventilator selection and technology. Unlike acute care ventilation, home ventilation must balance physiological effectiveness with long-term reliability, safety, portability, and ease of use for patients and caregivers. Advances in ventilator design have expanded the range of devices suitable for home use, allowing both non-invasive and invasive ventilation to be delivered safely outside the hospital setting (11,13).
Classification of Home Ventilators
Home ventilators can be broadly categorized into non–life-support ventilators and life-support ventilators, a distinction that is particularly relevant in neuromuscular disease.
Non–life-support ventilators are commonly used for nocturnal or intermittent non-invasive ventilation in patients with stable chronic respiratory failure. These devices typically provide pressure-targeted ventilation, rely on single-limb circuits with intentional leaks, and offer limited alarm systems. While suitable for early-stage disease and nocturnal support, their use may be inadequate in patients requiring prolonged or continuous ventilation (11,18).
Life-support ventilators are designed for patients with advanced ventilatory dependence, including those requiring daytime or continuous support and those ventilated invasively via tracheostomy. These devices offer more robust alarm systems, internal batteries, precise control of ventilation parameters, and compatibility with both single- and dual-limb circuits. In neuromuscular disease, life-support ventilators are often required as respiratory muscle weakness progresses and ventilatory needs increase (13,19).
Circuit Configurations and Their Implications
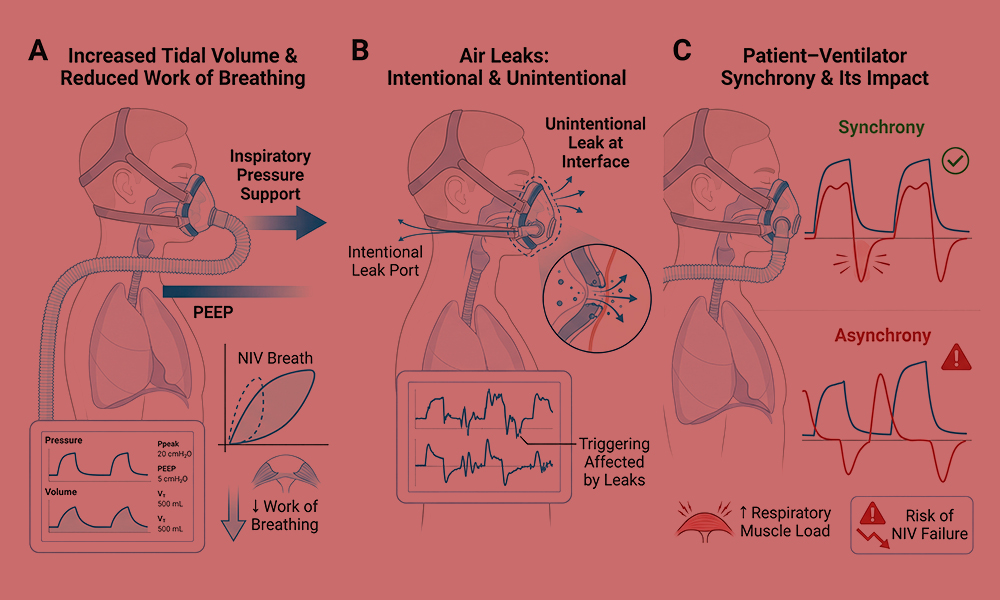
Ventilator circuits used in home mechanical ventilation include single-limb circuits with intentional leaks and dual-limb circuits with separate inspiratory and expiratory limbs. Single-limb circuits are most commonly employed for non-invasive ventilation due to their simplicity and compatibility with mask interfaces. However, they are inherently susceptible to unintentional leaks, which can affect triggering, cycling, and accurate monitoring of delivered volumes (16,18).
Dual-limb circuits are more frequently used in invasive ventilation and in patients requiring high levels of ventilatory support. They allow more accurate measurement of tidal volume and minute ventilation and facilitate the use of active exhalation valves. These features are particularly important in neuromuscular patients with minimal spontaneous respiratory effort or complete ventilator dependence (13).
Ventilation Modes and Control Strategies
Home ventilators used in neuromuscular disease primarily employ pressure-targeted ventilation modes, which are generally better tolerated and more adaptable to leaks than volume-targeted modes (4,18). Pressure support ventilation with a backup respiratory rate is widely used for both non-invasive and invasive ventilation, providing assistance during spontaneous breathing while ensuring minimum ventilation during apnea or hypoventilation.
Volume-targeted ventilation may be used in selected patients, particularly in invasive ventilation, to guarantee a fixed tidal volume. However, volume-controlled modes can be less well tolerated during non-invasive ventilation due to leak-related inaccuracies and patient–ventilator asynchrony (18).
More recently, hybrid modes such as volume-assured pressure support have been incorporated into home ventilators. These modes aim to combine the comfort and leak tolerance of pressure support with the stability of volume targeting, which may be advantageous in neuromuscular patients with progressive respiratory muscle weakness (13,18).
Triggering, Cycling, and Leak Compensation
Sensitive triggering and effective leak compensation are critical technological features for home ventilators used in neuromuscular disease. Weak inspiratory efforts and the presence of unintentional leaks can impair the ventilator’s ability to detect patient effort, leading to ineffective triggering or auto-triggering (16,18).
Modern home ventilators incorporate advanced algorithms to adjust trigger sensitivity, compensate for leaks, and optimize cycling from inspiration to expiration. These technologies improve patient–ventilator synchrony, comfort, and adherence, which are essential for long-term success of home ventilation (16).
Monitoring, Alarms, and Safety Features
Safety considerations are paramount in home mechanical ventilation, particularly for patients with high ventilatory dependence. Life-support ventilators are equipped with comprehensive alarm systems to detect disconnection, apnea, high or low pressure, and power failure. Internal and external battery systems provide essential backup during power outages, a critical requirement for patients receiving continuous ventilation (19,20).
Monitoring capabilities vary among devices and may include measurements of tidal volume, respiratory rate, leak, and estimated carbon dioxide levels. While these parameters are not substitutes for clinical assessment, they provide valuable information for troubleshooting and long-term management (16,18).
Remote Monitoring and Telemedicine Integration
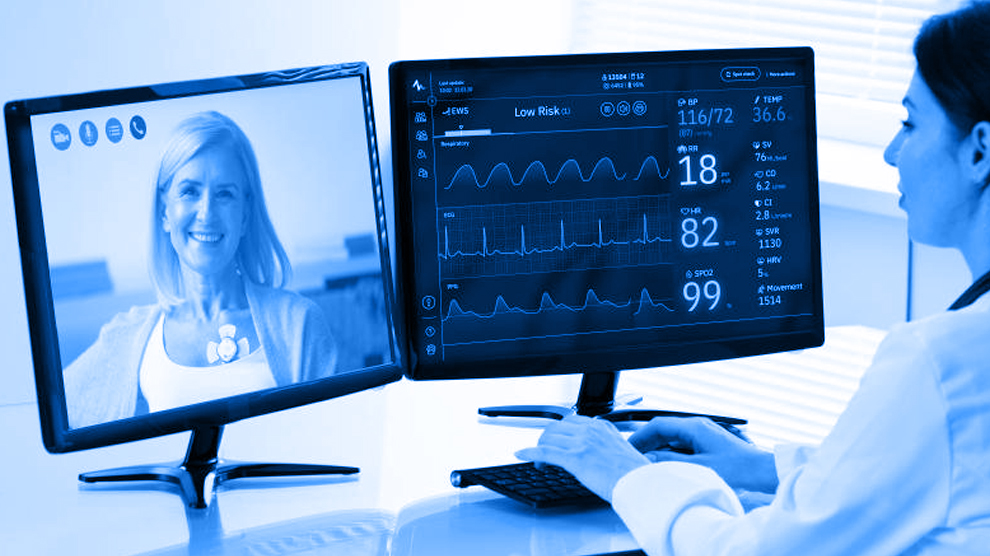
An increasing number of home ventilators now support remote monitoring and data transmission, enabling clinicians to assess ventilator performance, adherence, and selected physiological parameters without requiring in-person visits (16,18). This capability is particularly valuable in neuromuscular disease, where patients may have limited mobility and require frequent adjustments as their condition evolves.
Remote monitoring also introduces new considerations related to data interpretation, privacy, and regulatory oversight, emphasizing the need for standardized approaches to device management and follow-up in the home setting (19).
References
- Howard RS, Wiles CM, Loh L. Respiratory complications and their management in motor neuron disease. Brain. 1989;112(Pt 5):1155–1170.
- Finder JD, Birnkrant D, Carl J, et al. Respiratory care of the patient with Duchenne muscular dystrophy. Am J Respir Crit Care Med. 2004;170(4):456–465.
- Benditt JO. Respiratory complications of neuromuscular disease. Semin Respir Crit Care Med. 2002;23(3):231–240.
- Annane D, Orlikowski D, Chevret S, et al. Nocturnal mechanical ventilation for chronic hypoventilation in neuromuscular disease. Cochrane Database Syst Rev. 2014;(12):CD001941.
- Bourke SC, Bullock RE, Shaw PJ, Gibson GJ. Noninvasive ventilation in ALS: indications and effect on quality of life. Neurology. 2003;61(2):171–177.
- Laghi F, Tobin MJ. Disorders of the respiratory muscles. Am J Respir Crit Care Med. 2003;168(1):10–48.
- Bach JR. Mechanical insufflation–exsufflation: comparison of peak expiratory flows with manually assisted and unassisted coughing techniques. Chest. 1993;104(5):1553–1562.
- Sancho J, Servera E, Díaz J, Marín J. Efficacy of mechanical insufflation–exsufflation in medically stable patients with amyotrophic lateral sclerosis. Chest. 2004;125(4):1400–1405.
- Mellies U, Ragette R, Schwake C, et al. Daytime predictors of sleep disordered breathing in children and adolescents with neuromuscular disorders. Neuromuscul Disord. 2003;13(2):123–128.
- Ward S, Chatwin M, Heather S, Simonds AK. Randomised controlled trial of non-invasive ventilation for nocturnal hypoventilation in neuromuscular disease. Lancet. 2005;365(9473):1421–1427.
- Simonds AK. Home ventilation. Eur Respir J. 2003;22(47 Suppl):38s–46s.
- Chatwin M, Nickol AH, Morrell MJ, Polkey MI, Simonds AK. Randomised trial of inpatient versus outpatient initiation of home mechanical ventilation in neuromuscular disease. Thorax. 2008;63(10):927–934.
- Toussaint M, Chatwin M, Gonzales J, Berlowitz DJ. Advances in home mechanical ventilation for neuromuscular disease. Lancet Respir Med. 2021;9(4):386–398.
- Sancho J, Ferrer S, Bures E, et al. Noninvasive ventilation effectiveness and the effect of bulbar involvement in ALS patients. Respir Care. 2019;64(4):395–402.
- Bach JR, Gonçalves MR, Hamdani I, Winck JC. Extubation of patients with neuromuscular weakness: a new management paradigm. Chest. 2010;137(5):1033–1039.
- González-Bermejo J, Perrin C, Janssens JP, et al. Proposal for a systematic analysis of polygraphy or polysomnography for identifying poor ventilator settings in patients receiving home noninvasive ventilation. Thorax. 2012;67(8):702–710.
- Windisch W. Impact of home mechanical ventilation on health-related quality of life. Eur Respir J. 2008;32(5):1328–1336.
- Rabec C, Gonzalez-Bermejo J. Algorithms for home ventilators. Respir Care. 2019;64(6):673–688.
- Lloyd-Owen SJ, Donaldson GC, Ambrosino N, et al. Patterns of home mechanical ventilation use in Europe. Eur Respir J. 2005;25(6):1025–1031.
- Garner DJ, Berlowitz DJ, Douglas J, et al. Home mechanical ventilation in Australia and New Zealand. Eur Respir J. 2013;41(1):39–45.
- Bourke SC, Tomlinson M, Williams TL, Bullock RE, Shaw PJ, Gibson GJ. Effects of non-invasive ventilation on survival and quality of life in ALS. Lancet Neurol. 2006;5(2):140–147.
- Carlucci A, Richard JC, Wysocki M, et al. Noninvasive versus conventional mechanical ventilation. Am J Respir Crit Care Med. 2001;163(4):874–880.
- Vianello A, Arcaro G. Noninvasive ventilation as a palliative measure in end-stage neuromuscular disease. Respir Care. 2014;59(10):e149–e151.
- Moss AH, Oppenheimer EA, Casey P, et al. Patients with amyotrophic lateral sclerosis receiving long-term mechanical ventilation. Chest. 1996;110(1):249–255.